
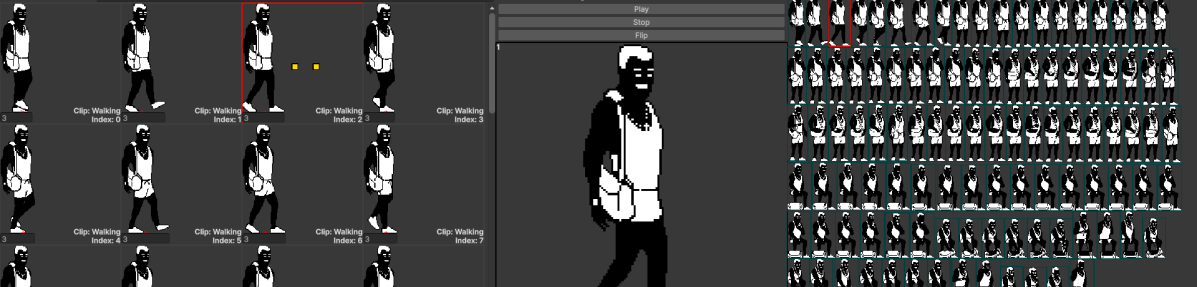
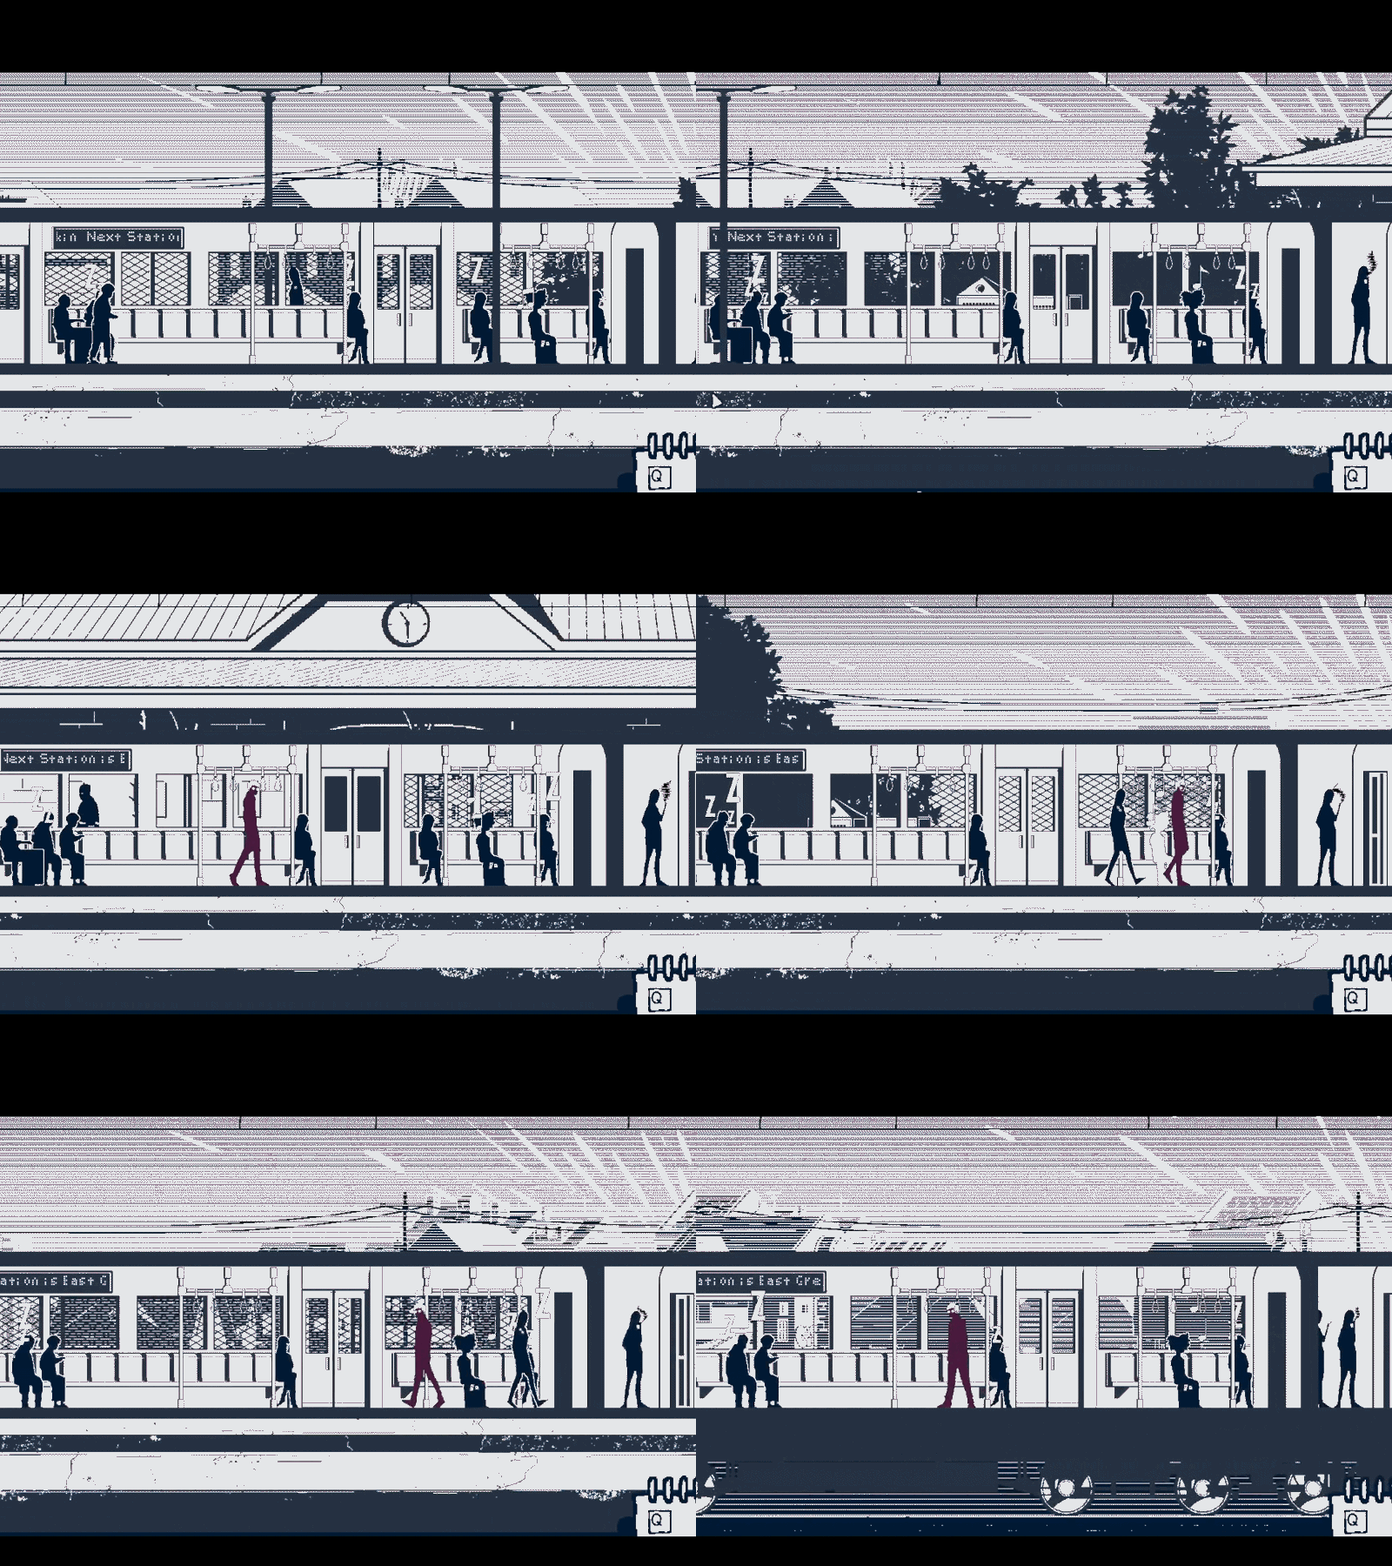
Hello. This is my Sprite and Animation system I built for Traitors on the Train. The video above is a walkthrough of the workflow but here I will show the inner workings of it all.
Where Unity’s System Falls Short
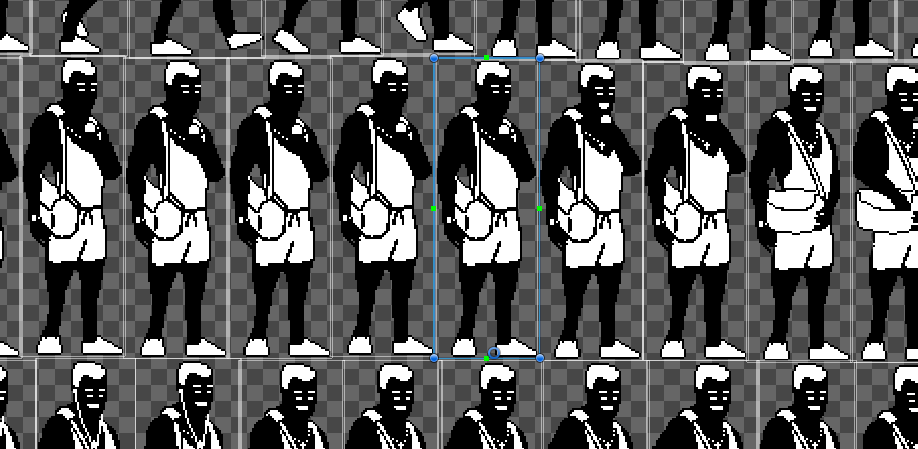
Defining pivot points in a sprite animation workflow is also a difficult task. Unfortunately, you cannot simple import a animated file into Unity. Instead you import an atlas where you have to the pivot points manually. I have 104 sprites for this one NPC and I’m aiming for 60 NPCs in Traitors on the Train. That’s about 6000 sprites and therefore 6000 pivots. Alternatively you can align your sprites in grid cells. Each grid cell would be the same size and you orient the sprite basing the bottom center of the grid cell to be your pivot. You would have to place the sprite in a pixel perfect position otherwise the animation would jitter at run time.
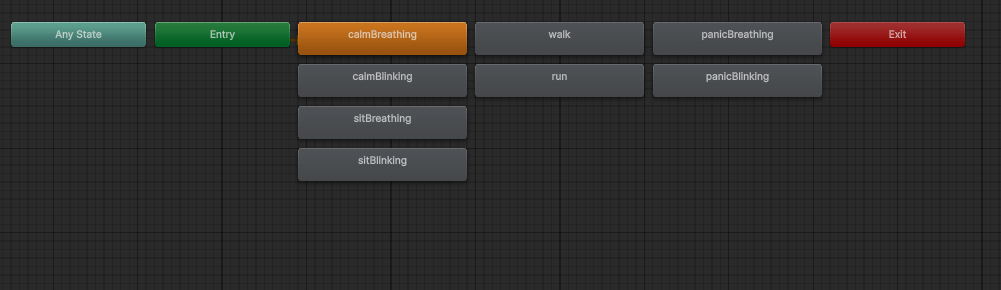

I’ve always dislike Unity’s Animator. It felt like it was playing the role of the middle man. I assume the Animator was built for 3D rather than 2D, but tries to cater for both. The generic structure of the tool left me with pointless features and missing features I needed in my specific context and workflow. I much rather use code over visual scripting and the Animator felt like a poor version of visual scripting. In code the animator cannot be accessed at runtime because that class lives in the Editor library, meaning these state nodes cannot be access directly at runtime. Sometimes I needed those states. The workaround was to access the data I needed in another editor script and store that data in a scriptable object somewhere. I always felt like I was fighting against the animator rather than it helping me.
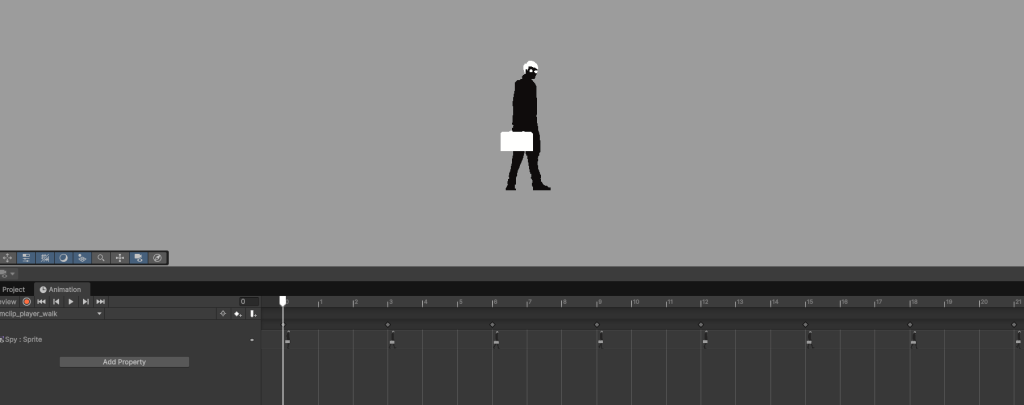
The animation clip system was also a bit of a thorn in my workflow. I assume this is how Unity wants developers to set up the workspace. You put the Animation clip window at the bottom and the scene window at the top and adjust the keyframe from there. I have a lot of animations plus building the rest of the game. When I get an animatable game object in my project I just want to open a window and do it there, not do this set up. Sometimes I may not have a prefab ready for this too. I could work with it, but every time I set some animations up, I always felt like there was a better way for me.
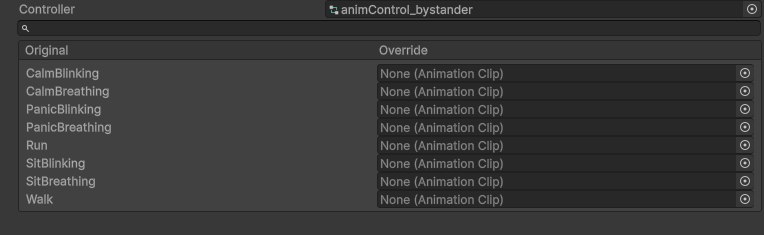
Okay this was annoying too. Animation Override Controllers. Each NPC had the same animation states but different animation clips. This should be an easy one to solve… nope. You make an animation override controller for each NPC and then assign each clip here. And then this override controller acts as the animation controller in the Animator component. Lots of clicking and dragging. I used to dread this part because I felt like setting up the animation clips were the only things I should be setting up. Knowing what I know now, I would’ve built some sort of editor tool that would read the file name and automatically assign the clips, because it was the same process every time.
Data Structures
    [Serializable] public struct MarkerKey
    {
        public Color32 color;
        public MarkerType type;
    }
    [Serializable] public struct MarkerPosition
    {
        public Vector2 objectPos;
        public MarkerType type;
    }
    [Serializable] public struct SimpleSprite
    {
        public Vector4 uvSizeAndPos;
        public Vector2 uvPivot;
        public Vector3 worldSize;
        public int index;
    }
    [Serializable] public struct MotionSprite
    {
        public SimpleSprite sprite;
        public MarkerPosition[] markers;
        public int holdFrames;
    }
So almost always, when I build systems, I start by defining data structures that I may need. Overtime these will change, depending on how the system evolves but starting here helps me ground myself to the data. The question is simple, “what is a sprite?”. The answer is defined in the screenshot above, a UV size and position. A single vector4 is the bare bones. Where is the sprite in the texture and how big. From there I eventually needed another vector2 for a pivot, a world size and index in the texture. You can see I start to stack these data structures together making specific types, like the motion sprite, which needs everything a simple sprite has however it also needs a marker position which I talk about in the video and how long it holds its frame in the animation.
public class AtlasSO : ScriptableObject
{
    public Texture2D texture;
    public Color32 spriteConnectColor = Color.clear;


    [Header("Motion Settings")]
    public EntityMotionType entityMotionType;
    public Color32 pivotColor = Color.clear;

    [Header("Sliced Settings")]
    public Color32 sliceColor = Color.clear;

    [Header("Generated")]
    public MotionSprite[] motionSprites;
    public SimpleSprite[] simpleSprites;
    public SliceSprite[] slicedSprites;
    public AtlasClip[] clips;
    public MarkerKey[] markers;

    public Dictionary<int, AtlasClip> clipDict;

    public void UpdateClipDictionary()
    {
        clipDict = BuildClipKeys(clips);
    }
}
From there I store these sprites in a scriptable object I call AtlasSO. For each sprite atlas texture, one of these created with it. There’s lots of types of textures so this scriptable object got pretty generic.
Renderer Component
To render anything in a game, a material and mesh needs to exist. I’m making a 2D game which is fortunate for me because every mesh is a quad made up of two triangles. I could not use Unity’s sprite renderer because I am defining my own sprites. So now a custom renderer is needed which means, I would need to make my own render pipeline. I’m glad this was eventually worth it.
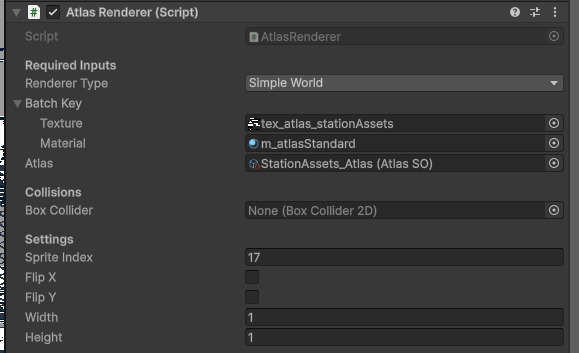
So on the game object scope, I need a rendering component I call my “Atlas Renderer”. It requires a type, a texture, a material and an AtlasSO. In the Settings, I have a sprite index, flip options and sizing options.
    public void UpdateSpriteInputs(SimpleSprite newSprite)
    {
        sprite = newSprite;
        spriteIndex = newSprite.index;
        worldPivotAndSize.z = newSprite.worldSize.x;
        worldPivotAndSize.w = newSprite.worldSize.y;
        uvSizeAndPosition = newSprite.uvSizeAndPos;

        scaleAndFlip.x = width;
        scaleAndFlip.y = height;

        spriteIndex = sprite.index;
        FlipHSimple(flipX);
        FlipVSimple(flipY);
        SetBounds();


        if (boxCollider == null) return;
        boxCollider.size = bounds.size;
        boxCollider.offset = bounds.center - transform.position;

    }
In my Atlas Renderer I need to pass in the information from the AtlasSO to the renderer itself to store. The renderer component does two main things. It stores data of the current sprite it is rendering and subscribes itself to a Sprite batch. Now renderer components in 2D, don’t actually render the object. In fact, it acts as a container for the Render Feature to eventually render the sprite. I’ll explain below.
Preparation and Batching
So there’s more context to get through before I move on. On modern GPU hardware, we can use batching techniques to render sprites. This means, instead of telling the CPU to render each sprite one draw call at a time, we can instead render batches of them but there are requirements. You would notice earlier, in the inspector I have a struct called “BatchKey”. As long as the texture and the material match those sprites can be rendered within a single draw call.
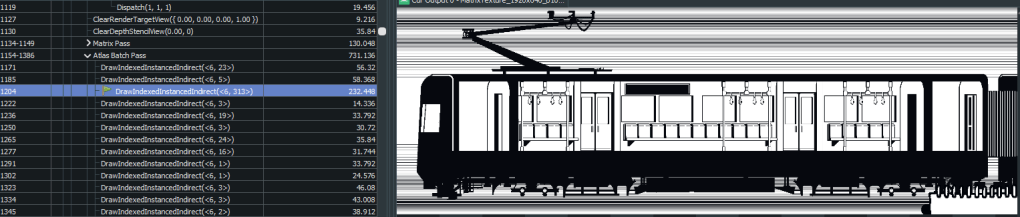
In this image on the 1204th draw call, the entire train rendered in 232 microseconds. That’s 31 sprites in this example. To do this I have a list and a dictionary. The Batch key is used as the key and the Sprite Batch is the value.
    public class SpriteBatch
    {
        public List<AtlasRenderer> atlasRendererList = new List<AtlasRenderer>();

        public SpriteData[] spriteData = new SpriteData[MAX_SPRITE_DATA_COUNT];

        public GraphicsBuffer spriteDataBuffer;
        public GraphicsBuffer argsBuffer;

        public MaterialPropertyBlock mpb;
    }
Sprite Batches contain the list of renderer components to render, an array of sprite data to assign the the sprite data buffer, an args buffer for the renderer feature to read and a material property block. Okay. To reiterate, this Sprite Batch represents that draw call from the image eariler.
    private void OnEnable()
    {
        if (batchKey.texture == null) return;
        batchKey.texture = atlas.texture;
        RegisterRenderer(this);
    }
    public static void RegisterRenderer(AtlasRenderer renderer)
    {
        if (renderer.batchKey.material == null) return;
        renderer.batchKey.material.enableInstancing = true;

        UnregisterRenderer(renderer);

        if (!spriteBatchDict.TryGetValue(renderer.batchKey, out SpriteBatch batch))
        {
            batch = new SpriteBatch();
            batch.spriteDataBuffer = new GraphicsBuffer(GraphicsBuffer.Target.Structured, MAX_SPRITE_DATA_COUNT, SPRITE_DATA_STRIDE);
            batch.argsBuffer = new GraphicsBuffer(GraphicsBuffer.Target.IndirectArguments, 1, ARGS_STRIDE);
            batch.mpb = new MaterialPropertyBlock();

            spriteBatchDict.Add(renderer.batchKey, batch);
        }

        batch.atlasRendererList.Add(renderer);
    }
Now the Atlas Renderer component registers itself when it’s enabled. It also unregisters itself when it’s disabled so the sprite stops rendering. The function above checks to see if the batch key already exists in the dictionary. If it does, it adds itself to the batch list to be rendered otherwise it creates a new batch and slots itself there.
Renderer Feature
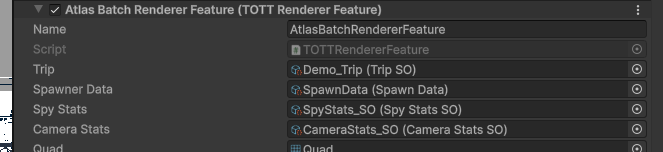
In my 2D Universal Render Pipeline Asset_Renderer I add a new Render Feature I’m calling TOTT (Traitors on the Train) Renderer Feature.

In Unity 6 you can inherit from ScriptableRendererFeature and work with Unity’s render graph system. This is where I sorta let Unity take the wheel and use their API here.
    private class AtlasBatchPass : ScriptableRenderPass
    {
        private static CameraStatsSO cameraStats;
        private static Mesh quad;
        private uint[] args;

        public AtlasBatchPass( CameraStatsSO camStats, Mesh quadToUse)
        {
            renderPassEvent = RenderPassEvent.AfterRenderingOpaques;
            cameraStats = camStats;
            quad = quadToUse;
        }

        public override void RecordRenderGraph(RenderGraph renderGraph, ContextContainer frameData)
        {
            UniversalResourceData resources = frameData.Get<UniversalResourceData>();

            using IRasterRenderGraphBuilder builder = renderGraph.AddRasterRenderPass<AtlasPassData>("Atlas Batch Pass", out AtlasPassData passData);
            passData.cameraStats = cameraStats;
            builder.SetRenderAttachment(resources.activeColorTexture, 0);
            builder.SetRenderAttachmentDepth(resources.activeDepthTexture, AccessFlags.ReadWrite);
            builder.AllowPassCulling(false);

            args = new uint[5]
            {
                quad.GetIndexCount(0),
                0,
                quad.GetIndexStart(0),
                quad.GetBaseVertex(0),
                0
            };

            builder.SetRenderFunc((AtlasPassData data, RasterGraphContext ctx) =>
            {
                ExecuteBatch(ctx.cmd, data.cameraStats, quad, ref args);
            });
        }
First I create a scriptable render pass which is where I hold my quad mesh. Like I was saying before sprite is a quad so I only need to hold one instance of it, which is why the mesh lives in the render pass. Then I use the RecordRenderGraph override function to define my args buffer array and subscribe my execute batch call to the render functions.
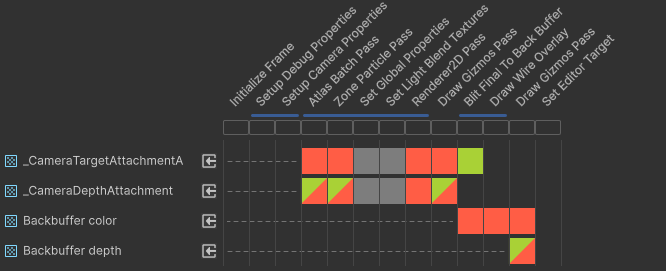
In the render graph viewer, the pass will show there.
Now for some nesting. I loop through each batch that exists and from each batch I loop through each renderer component reregistered to that batch. I’ll ignore the editor stuff. Thats just for prefab viewing.
        private static void ExecuteBatch(RasterCommandBuffer cmd, CameraStatsSO camStats, Mesh quad, ref uint[] args)
        {
#if UNITY_EDITOR
            PrefabStage prefabStage = PrefabStageUtility.GetCurrentPrefabStage();
            Scene prefabScene = default;
            if (prefabStage != null) prefabScene = prefabStage.scene;
#endif
            foreach ((BatchKey key, SpriteBatch data) spriteBatch in spriteBatchList)
            {
                int count = 0;
                for (int i = 0; i < spriteBatch.data.atlasRendererList.Count && count < MAX_SPRITE_DATA_COUNT; i++)
                {
                    AtlasRenderer renderer = spriteBatch.data.atlasRendererList[i];

                    if (renderer == null || !renderer.gameObject.activeInHierarchy) continue;
#if UNITY_EDITOR
                    if (prefabStage != null) { if (renderer.gameObject.scene != prefabScene) continue; }
#else
                    if (renderer.bounds.max.x < cameraStats.camWorldLeft || renderer.bounds.min.x > cameraStats.camWorldRight || renderer.bounds.max.y < cameraStats.camWorldBottom || renderer.bounds.min.y > cameraStats.camWorldTop) continue;

                    renderer.UpdateBounds();

                    switch (renderer.rendererType)
                    {
                        case AtlasRendererType.SimpleWorld:
                        case AtlasRendererType.MotionWorld:
                        {
                            SpriteData spriteData = spriteBatch.data.spriteData[count];

                            spriteData.worldPosition = renderer.transform.position;
                            spriteData.worldPivotAndSize = renderer.worldPivotAndSize;
                            spriteData.uvSizeAndPos = renderer.uvSizeAndPosition;
                            spriteData.scaleAndFlip = renderer.scaleAndFlip;
                            spriteData.custom = renderer.custom;
                            spriteData.customBit = renderer.customBit;
                            spriteBatch.data.spriteData[count] = spriteData;
                            count++;
                        }
                        break;

                        case AtlasRendererType.SliceWorld:
                        {
                            for (int j = 0; j < renderer.worldPivotsAndSizes.Length; j++)
                            {
                                SpriteData spriteData = spriteBatch.data.spriteData[count];

                                spriteData.worldPosition = renderer.transform.position;
                                spriteData.worldPivotAndSize = renderer.worldPivotsAndSizes[j];
                                spriteData.uvSizeAndPos = renderer.uvSizesAndPositions[j];
                                spriteData.scaleAndFlip = renderer.scalesAndFlips[j];
                                spriteData.custom = renderer.customs[j];
                                spriteData.customBit = renderer.customBit;
                                spriteBatch.data.spriteData[count] = spriteData;

                                count++;
                            }
                        }
                        break;
                    }
                }...
Then the renderer pass its data to the sprite data array. Note that for nine slicing, each sliced quad would be its own Sprite Data element which is why I had to split between each type.
                if (count == 0) continue;

                spriteBatch.data.spriteDataBuffer.SetData(spriteBatch.data.spriteData, 0, 0, count);
                args[1] = (uint)count;
                spriteBatch.data.argsBuffer.SetData(args);
                spriteBatch.data.mpb.SetBuffer("_SpriteData", spriteBatch.data.spriteDataBuffer);
                spriteBatch.data.mpb.SetTexture("_AtlasTexture", spriteBatch.key.texture);
                cmd.DrawMeshInstancedIndirect(quad, 0, spriteBatch.key.material, 0, spriteBatch.data.argsBuffer, 0, spriteBatch.data.mpb);
finally I set the buffers and texture to the matieral property block and use Unity’s DrawMesgInstancedIndirect to send over the data to the GPU to render.
The GPU Side
So the shader cannot be made in shader graph because structs and structured buffers are not available so I write everything in Unity’s shader lab instead.
            struct Attributes
            {
                float4 positionOS : POSITION;
                float2 uv : TEXCOORD0;
                uint instanceID : SV_InstanceID;
            };

            struct Varyings
            {
                float4 positionHCS : SV_POSITION;
                float2 uv : TEXCOORD0;
                uint instanceID : TEXCOORD1;
                float3 worldPos : TEXCOORD2;
            };

            StructuredBuffer<AtlasSprite> _SpriteData;

            TEXTURE2D(_AtlasTexture);
            SAMPLER(sampler_AtlasTexture);
To start my Attributes and Varyings have nothing special in them. Although one thing to note is the instanceID is the index of the batch. Just below is my StructuredBuffer that hold my AtlasSprites which is just a custom struct I have. Looks like this:
struct AtlasSprite
{
    float4 position;
    float4 pivotAndSize;
    float4 uvSizeAndPos;
    float4 scaleAndFlip;
    float4 custom;
    int customBit;
};
This is an identical struct to my SpriteData but now defined on the GPU. I sort of wished I kept the naming consistent. Oh well.
Because I am defining my instances in the SpriteData, there is no need for a c buffer like you would with a typical shader lab shader. All I have is instanced data or global data. To keep both batching intact and creative flexibility I have a float4 called custom and an int called customBit. So if I want to change parameters on the sprite I can whilst keeping the sprite batched. I don’t think Unity can do this.
                int bitMask = i.customBit;

                int diagonalMask = saturate(bitMask & DIAGONAL_TEXTURE_BIT);
                half diagonal = diagonalTex.r * diagonalMask;


                half3 col = i.custom.rgb + diagonal;
                half t = round(LinearLightness(col));

                int meridiaColorMask = saturate(bitMask & MERIDIA_COLOR_BIT);
                float3 meridiaColor = meridiaColorMask * _MeridiaColor;

                half3 finalCol = lerp((blackTex + col) * border + _BlackColor + meridiaColor, whiteTex * col + _BlackColor + meridiaColor, t);
An example is this shader here, where I use the custom float4 as an rgb color and the customBit to turn on and off a texture.
            Varyings vert(Attributes v)
            {
                Varyings o;

                AtlasSprite spriteData = _SpriteData[v.instanceID];


                float3 position = spriteData.position.xyz;

                float2 pivot = spriteData.pivotAndSize.xy;
                float2 size = spriteData.pivotAndSize.zw;

                float2 scale = spriteData.scaleAndFlip.xy;
                float2 objPos = v.positionOS.xy;

                objPos *= size * scale;
                objPos += pivot;

                float3 worldPos = float3(position.xy + objPos, position.z);
                o.worldPos = worldPos;
                o.positionHCS = TransformWorldToHClip(worldPos);
                o.uv = v.uv;
                o.instanceID = v.instanceID;

                return o;
            }

            half4 frag(Varyings i) : SV_Target
            {
                uint id = i.instanceID;
                AtlasSprite spriteData = _SpriteData[id];

                float2 uvSize = spriteData.uvSizeAndPos.xy;
                float2 uvPos = spriteData.uvSizeAndPos.zw;

                float2 scale = spriteData.scaleAndFlip.xy;
                float2 flip = spriteData.scaleAndFlip.zw;

                i.uv *= scale;
                i.uv = frac(i.uv);
                i.uv = (i.uv - 0.5) * flip + 0.5;
                i.uv *= uvSize;
                i.uv += uvPos;

                half4 color = SAMPLE_TEXTURE2D(_AtlasTexture, sampler_AtlasTexture, i.uv);

                half grey = color.r + (-(_DayNight * 1.1 - 0.9) * _DayNightFactor);
                half3 finalColor = grey + _BlackColor;

                float2 worldToTrain = (i.worldPos.xy - _TrainBoundsMin.xy) / _TrainBoundsSize.xy;
                half4 carriageSDF = SAMPLE_TEXTURE2D(_CarriageBoundsTexture, sampler_CarriageBoundsTexture, worldToTrain);
                float bayer = BayerX8(carriageSDF.r + 0.5,  i.positionHCS.y);

                float outside = max(step(worldToTrain.x, 0.0), step(1.0, worldToTrain.x));
                outside = max(outside,max(step(worldToTrain.y, 0.0),step(1.0, worldToTrain.y)));
                outside = max(outside, step(_TrainBoundsMin.z,i.worldPos.z));
                float alpha = max(bayer, outside) * color.a;

                clip(alpha - 0.001);
                return half4 (finalColor, 1);
            }
            ENDHLSL
Back to the standard shader. I use the world position of the component, and the sprite data so finally crop the sprite on the quad.
Animation
So again I’ll start with the Data structures. The Atlas Clip struct hold a type which is either loop, ping pong, one shot or manual as I discussed in the video. It also holds a motion index so I can look it up easily in the clip dictionary, a keyframe start and end.
    [Serializable] public struct AtlasClip
    {
        public string clipName;
        public ClipType clipType;
        public int motionIndex;
        public int keyframeStartIndex;
        public int keyframeEndIndex;
    }
At runtime I call PlayClip shown below.
    public void PlayClip(ref AtlasClip clip, Transform markerTransform = null)
    {
        if (clip.motionIndex != curMotionIndex)
        {
            curFrameIndex = clip.keyframeStartIndex;
            curMotionIndex = clip.motionIndex;
        }
        MotionSprite motionSprite = GetNextKeyframeIndex(atlas, clip, ref keyframeClock, ref curFrameIndex, ref prevFrameIndex);

        if (motionSprite.sprite.index == sprite.index) return;

        if (markerTransform != null && motionSprite.markers.Length > 0)
        {
            Vector3 markerPos = motionSprite.markers[0].objectPos;
            if (flipX) markerPos.x *= -1;
            markerPos.z = markerTransform.localPosition.z;
            markerTransform.localPosition = markerPos;
        }
        sprite = motionSprite.sprite;
        UpdateSpriteInputs(sprite);
        isAnimating = true;
    }
It waits until the next sprite is ready to render within the clip and updates the renderer accordingly.
    public static MotionSprite GetNextKeyframeIndex(AtlasSO atlas, AtlasClip clip, ref float keyframeClock, ref int curFrameIndex, ref int prevFrameIndex)
    {
        if (curFrameIndex > clip.keyframeEndIndex || curFrameIndex < clip.keyframeStartIndex) curFrameIndex = clip.keyframeStartIndex;

        keyframeClock += Time.deltaTime;

        MotionSprite curMotionSprite = atlas.motionSprites[curFrameIndex];
        int curFrame = (int)(keyframeClock * FRAMES_PER_SEC);

        if (curFrame < curMotionSprite.holdFrames) return curMotionSprite;

        switch (clip.clipType)
        {
            case ClipType.Loop:
            {
                prevFrameIndex = curFrameIndex;
                curFrameIndex++;

                if (curFrameIndex > clip.keyframeEndIndex)
                {
                    curFrameIndex = clip.keyframeStartIndex;
                }

                keyframeClock = 0;
            }
            break;
            case ClipType.PingPong:
            {
                if (curFrameIndex < clip.keyframeEndIndex && (curFrameIndex > prevFrameIndex || curFrameIndex == clip.keyframeStartIndex))
                {
                    prevFrameIndex = curFrameIndex;
                    curFrameIndex++;
                }
                else
                {
                    prevFrameIndex = curFrameIndex;
                    curFrameIndex--;
                }
                keyframeClock = 0;
            }
            break;
            case ClipType.OneShot:
            {
                prevFrameIndex = curFrameIndex;
                if (curFrameIndex < clip.keyframeEndIndex)
                {
                    curFrameIndex++;
                }
                keyframeClock = 0;
            }
            break;
        }

        return atlas.motionSprites[curFrameIndex];
    }
GetNextKeyFrameIndex is where most of the work happens. It increase the keyframeClock until it reaches the current motion sprite’ hold time. It checks what clip type the motion sprite is apart of and returns the next motion sprite.

On the interface all it looks like is this called in the Update loop.
Final Thoughts
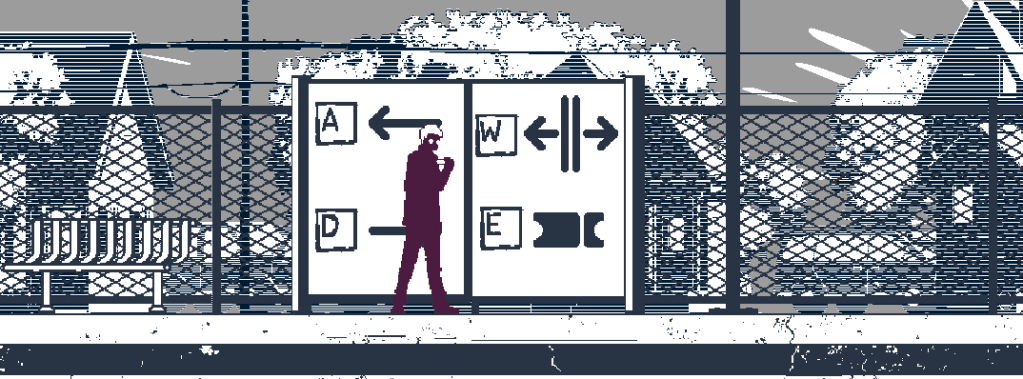
Its funny how a sprite has so much happening under the hood. Two triangles. This blog followed the inner workings of at least my rendering system. Unity doesn’t show theirs but I imagine this would be close to it with some added features I needed.
See ya later.

